Hugo Catalog
Decap
What is Decap?
Decap is an open source What You See Is What You Get (WYSIWYG) that can be used with static site generators in order to provide an easy to use editor view while still taking advantage of using your CI/CD pipeline for deploying your site.
Prerequisites:
In order to enable decap you need to have a Netlify and Github account, if you don’t have an account sign up for a free one before getting started.
Creating a Github OAuth App
We will be using Github for authenticating our users in order for them to login and make edits to our site.
Go here: https://github.com/settings/developers and click on New OAuth App button and fill out the fields for:
- Applicatiomn Name: Your apps name
- Homepage URL: URL for your site
- Application Description: Text description for your app.
- Authorization Callback URL:
https://api.netlify.com/auth/done
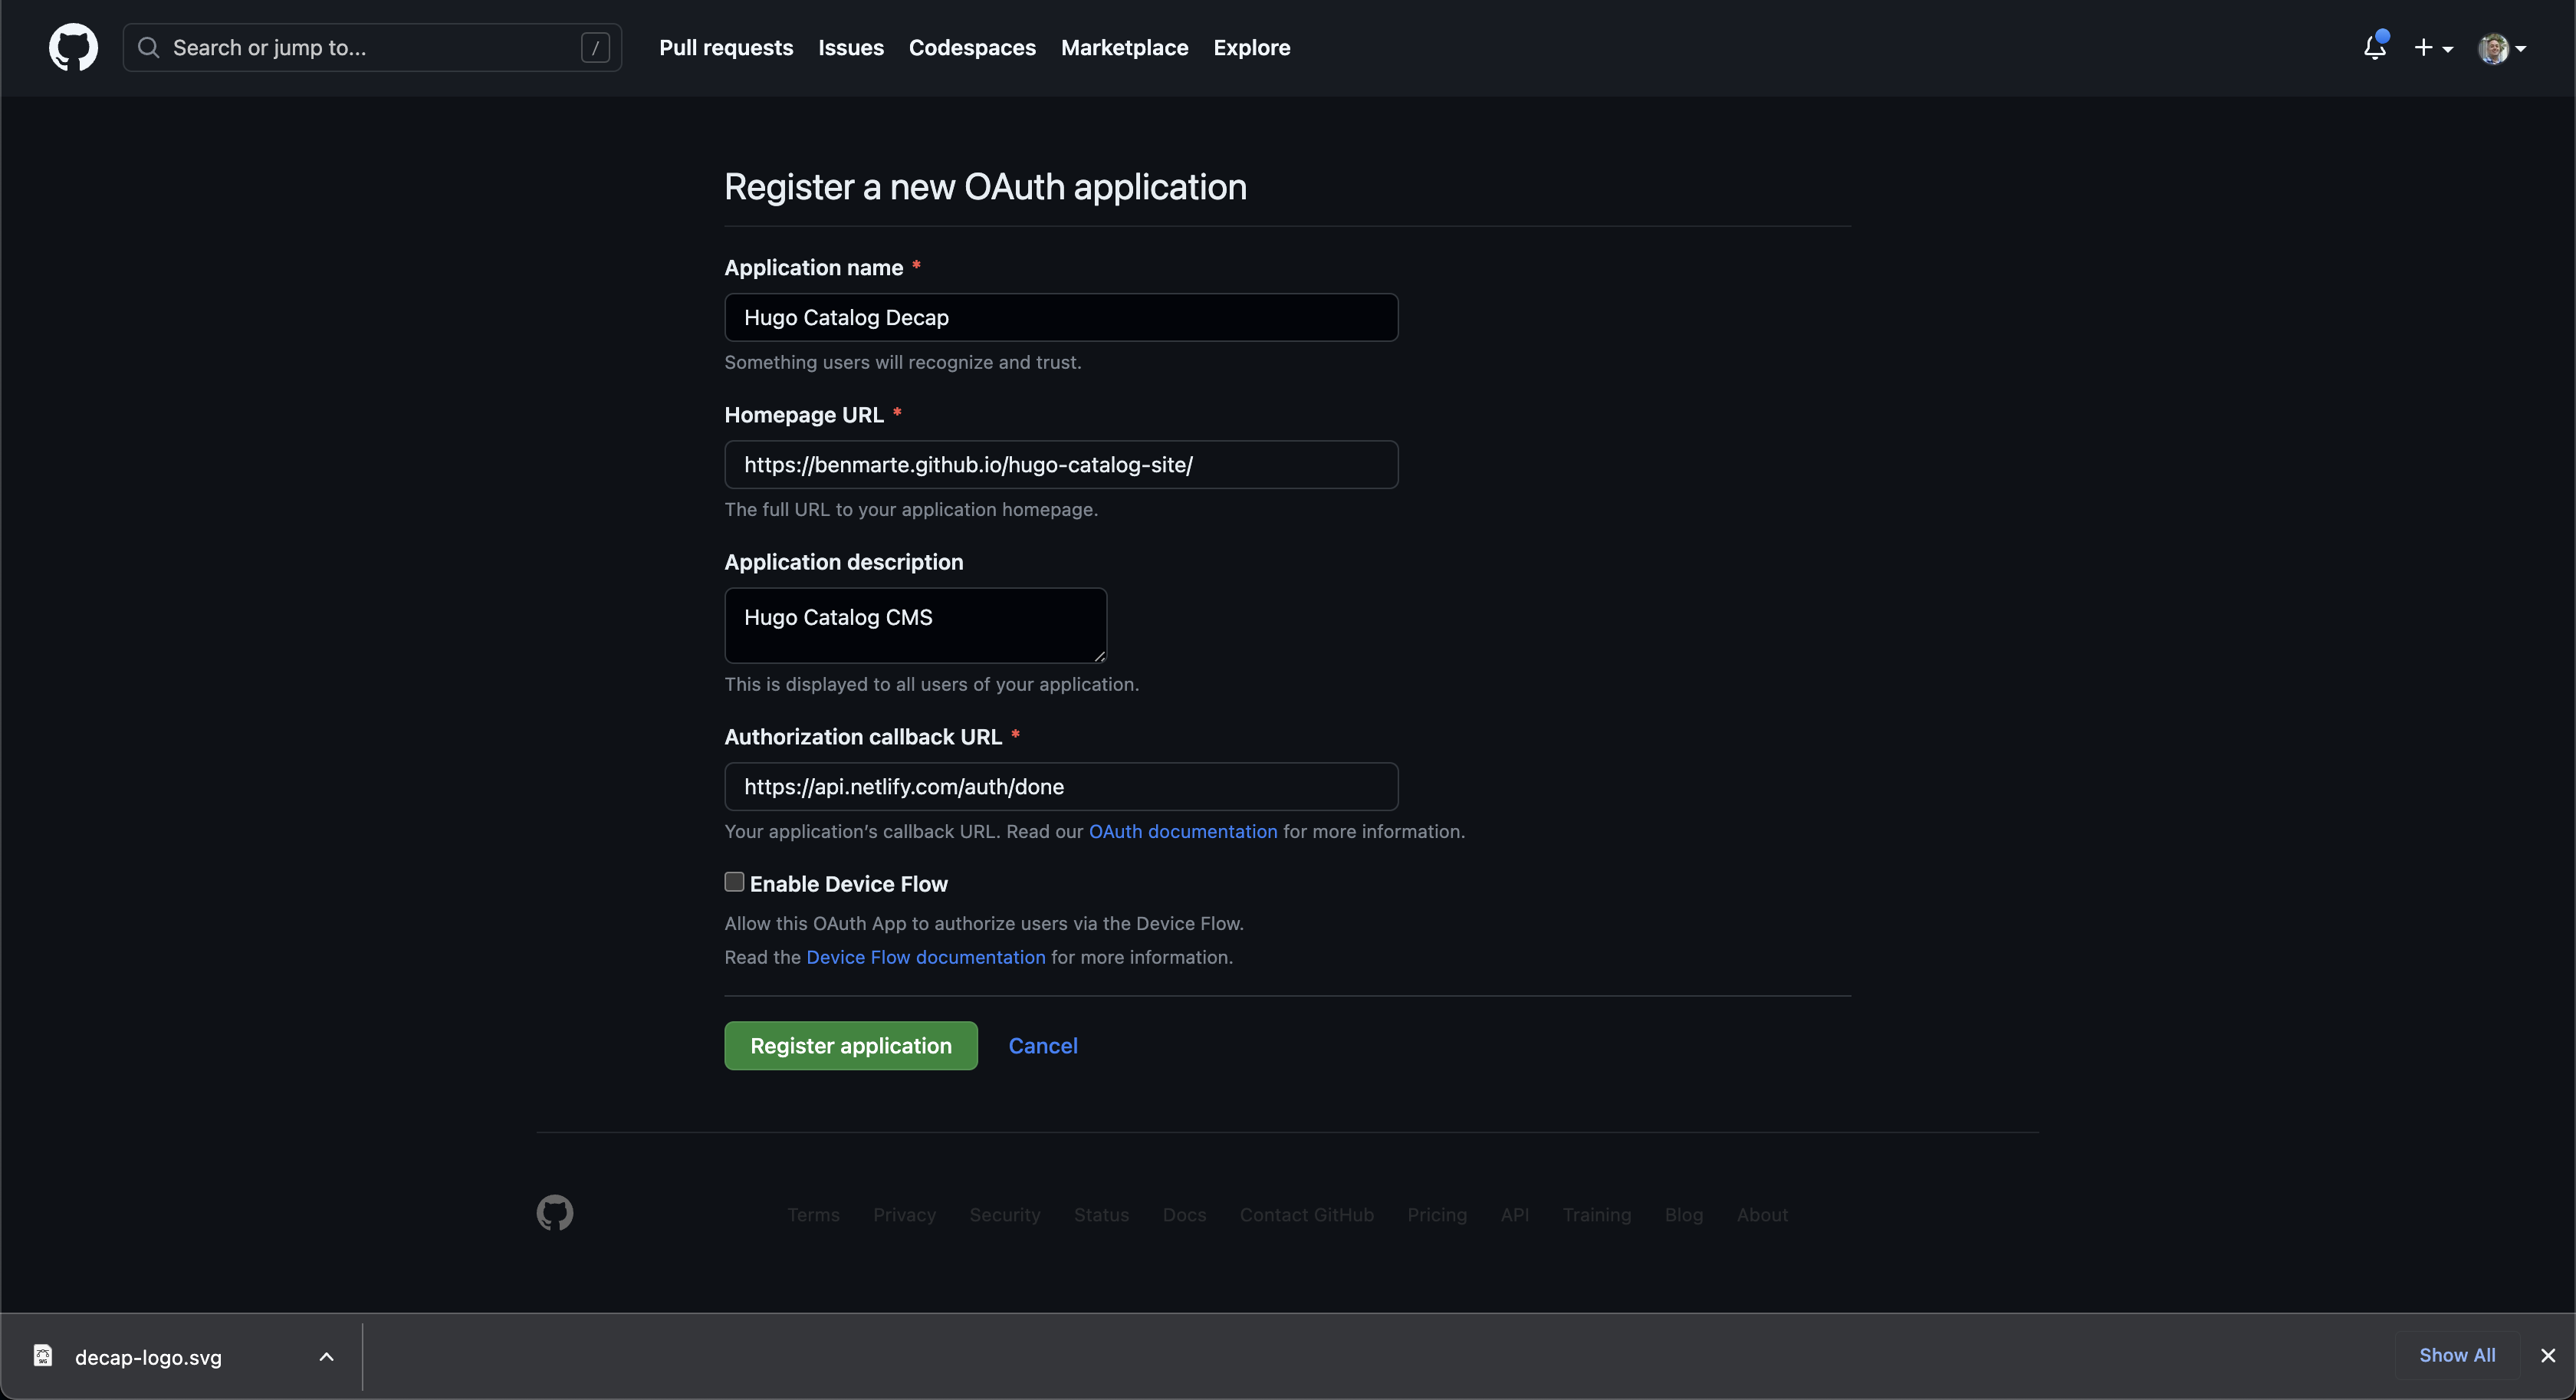
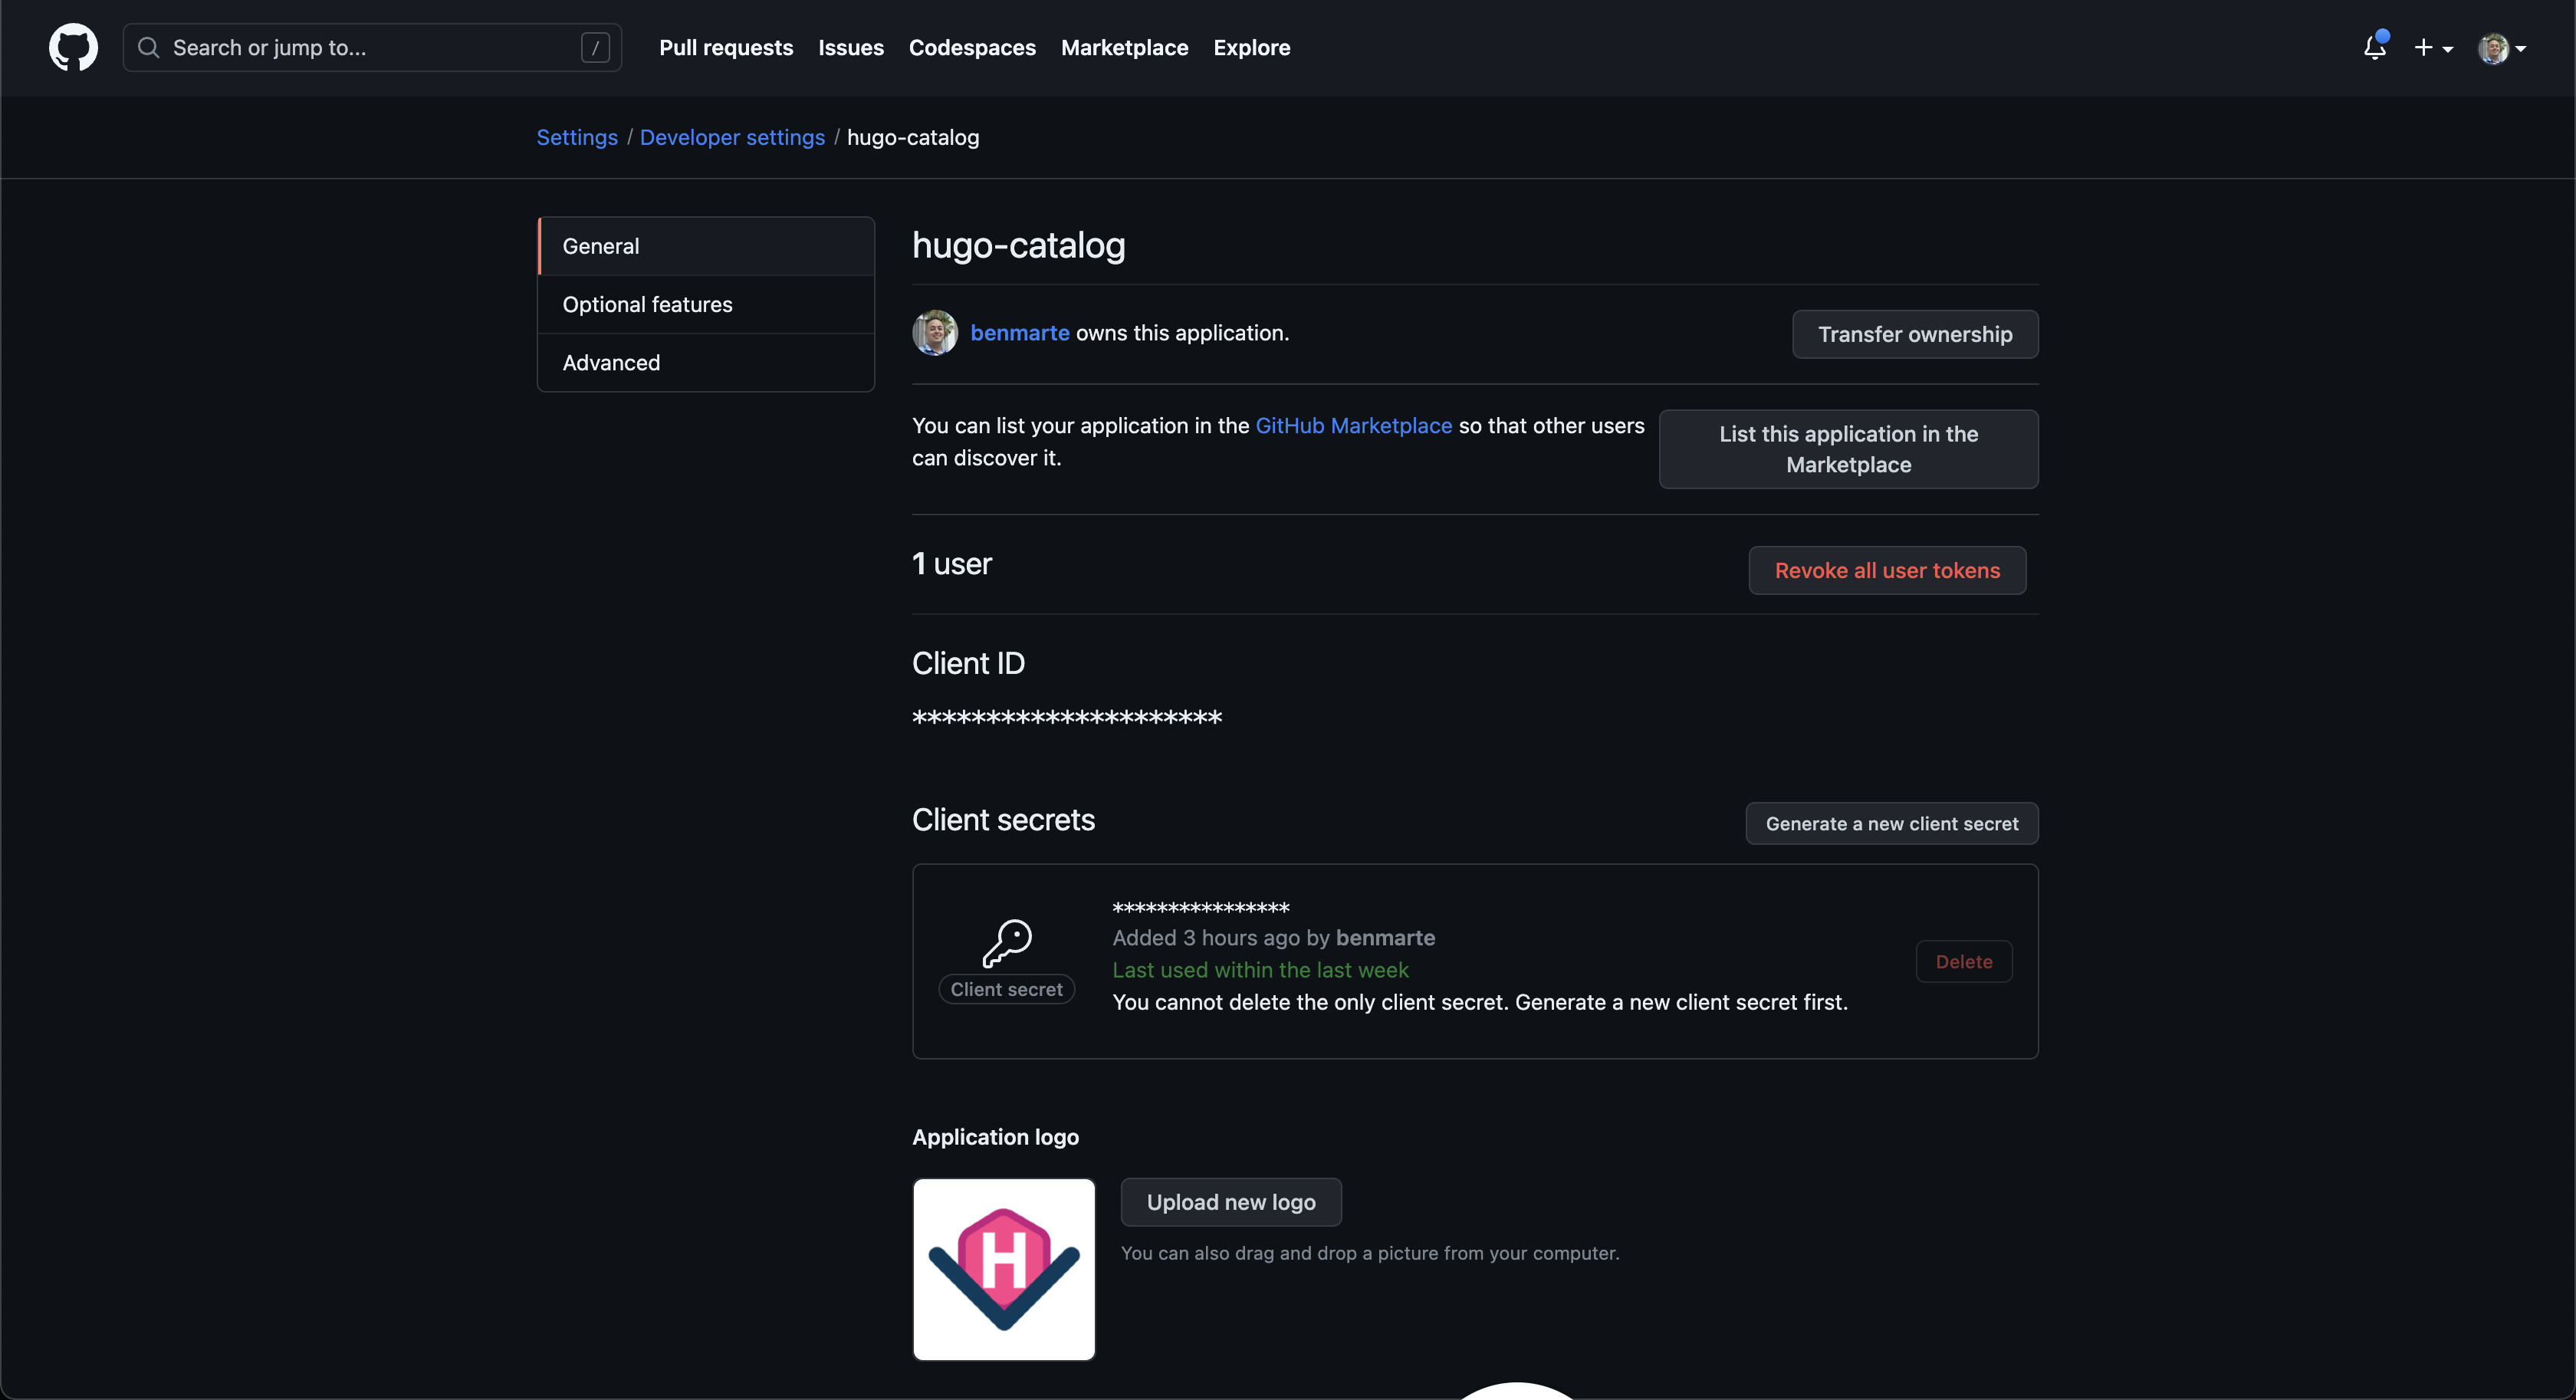
https://api.netlify.com/auth/doneOnce your OAuth app has been created you will need to get your Client ID and Client Secret. Click on Generate new client secret to get your client secret.
Creating a Gitlab OAuth App
Click this link: https://gitlab.com/oauth/applications in order to create a Gitlab OAuth application. In the name field you can put whatever you want in this example we are going to use Decap CMS and in the Redirect URI you need to use https://yoursite.com/admin/, uncheck the Confidential checkmark and under Scopes select api, then click Save application.
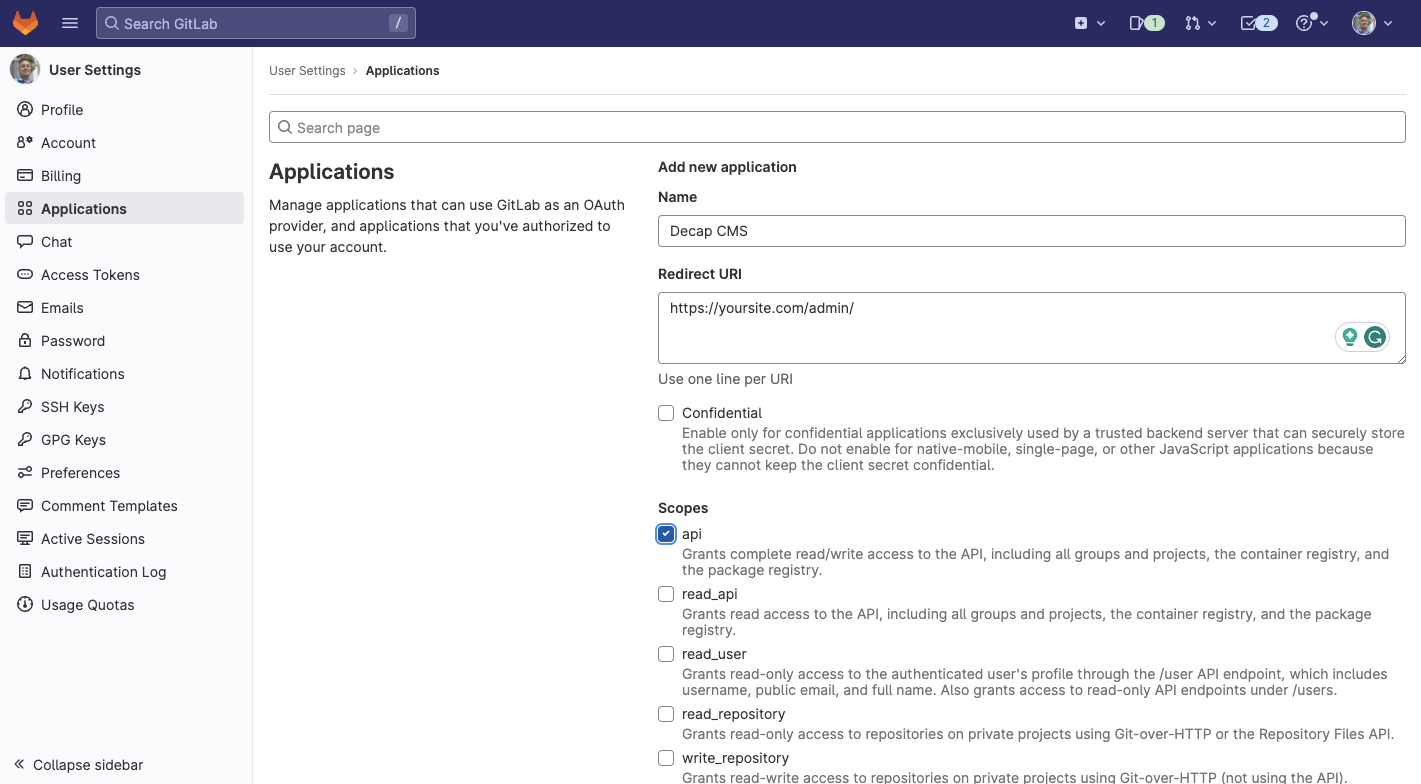
/ in order for it to work properly, ie: https://yoursite.com/admin/Setting up your netlify site
Once you login to Netlify under Sites click on the add new site button dropdown and select deploy manually.
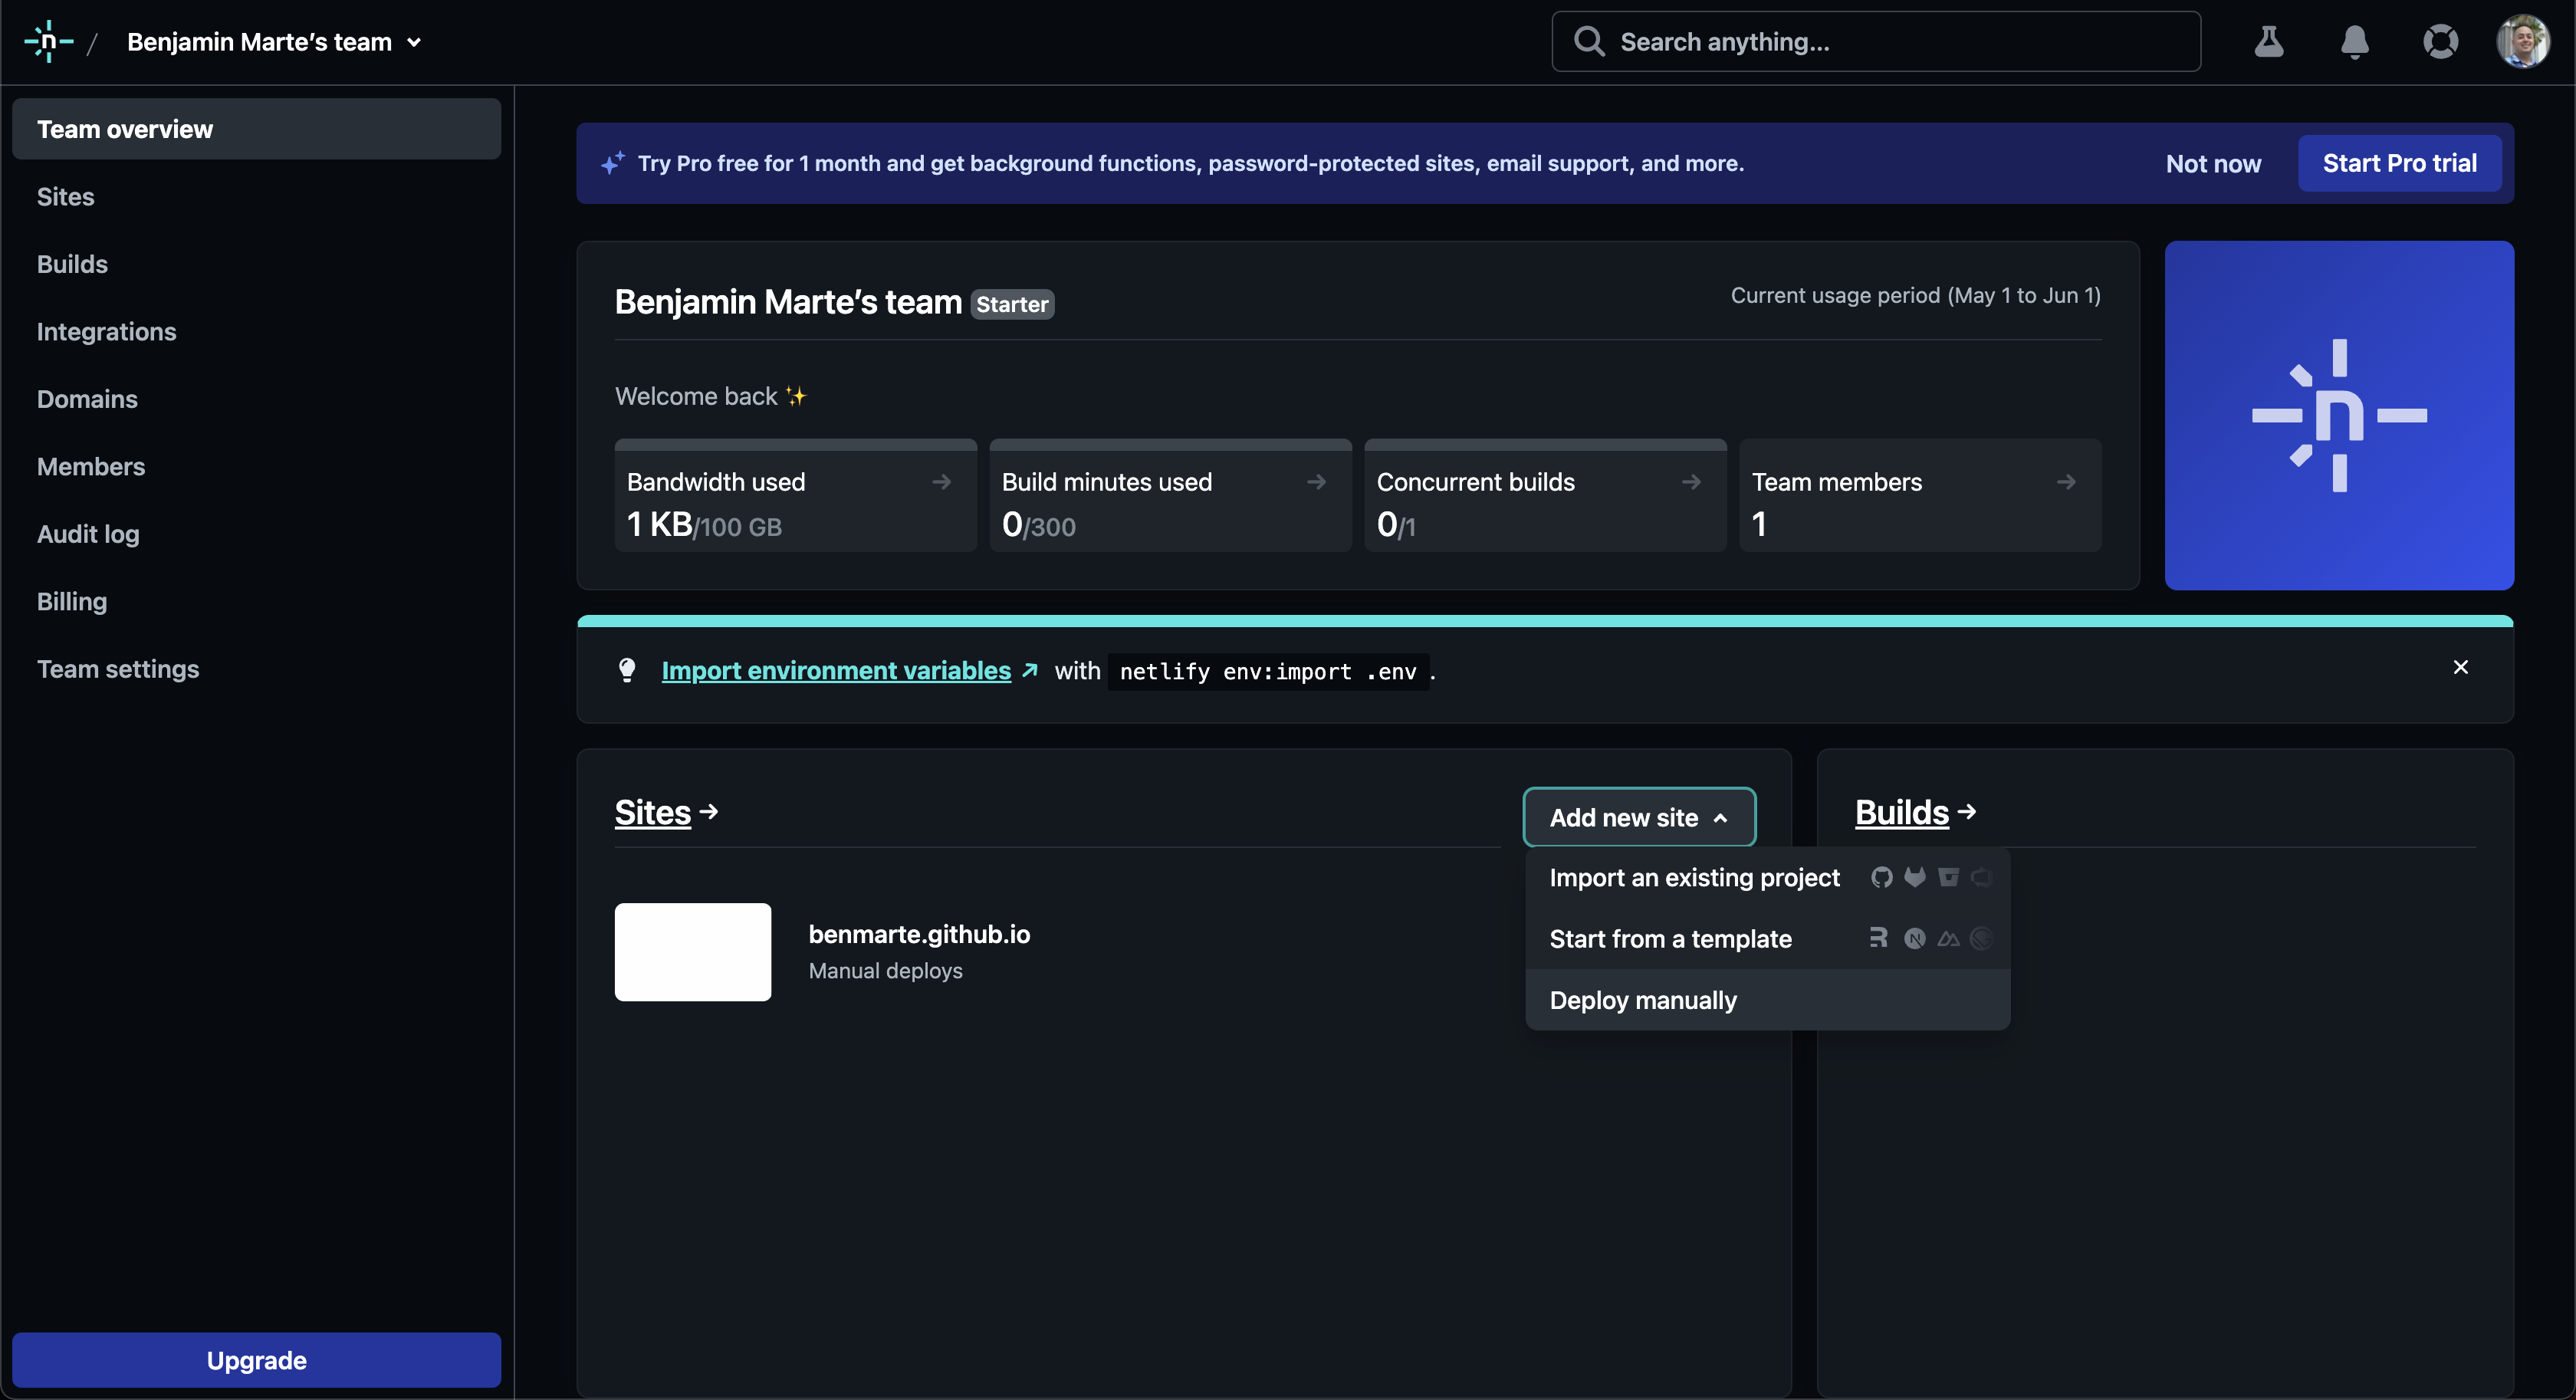
We are not going to actually use Netlify to host our site we are simply going to use it to enable our editors to login with github so they can make changes with decap.
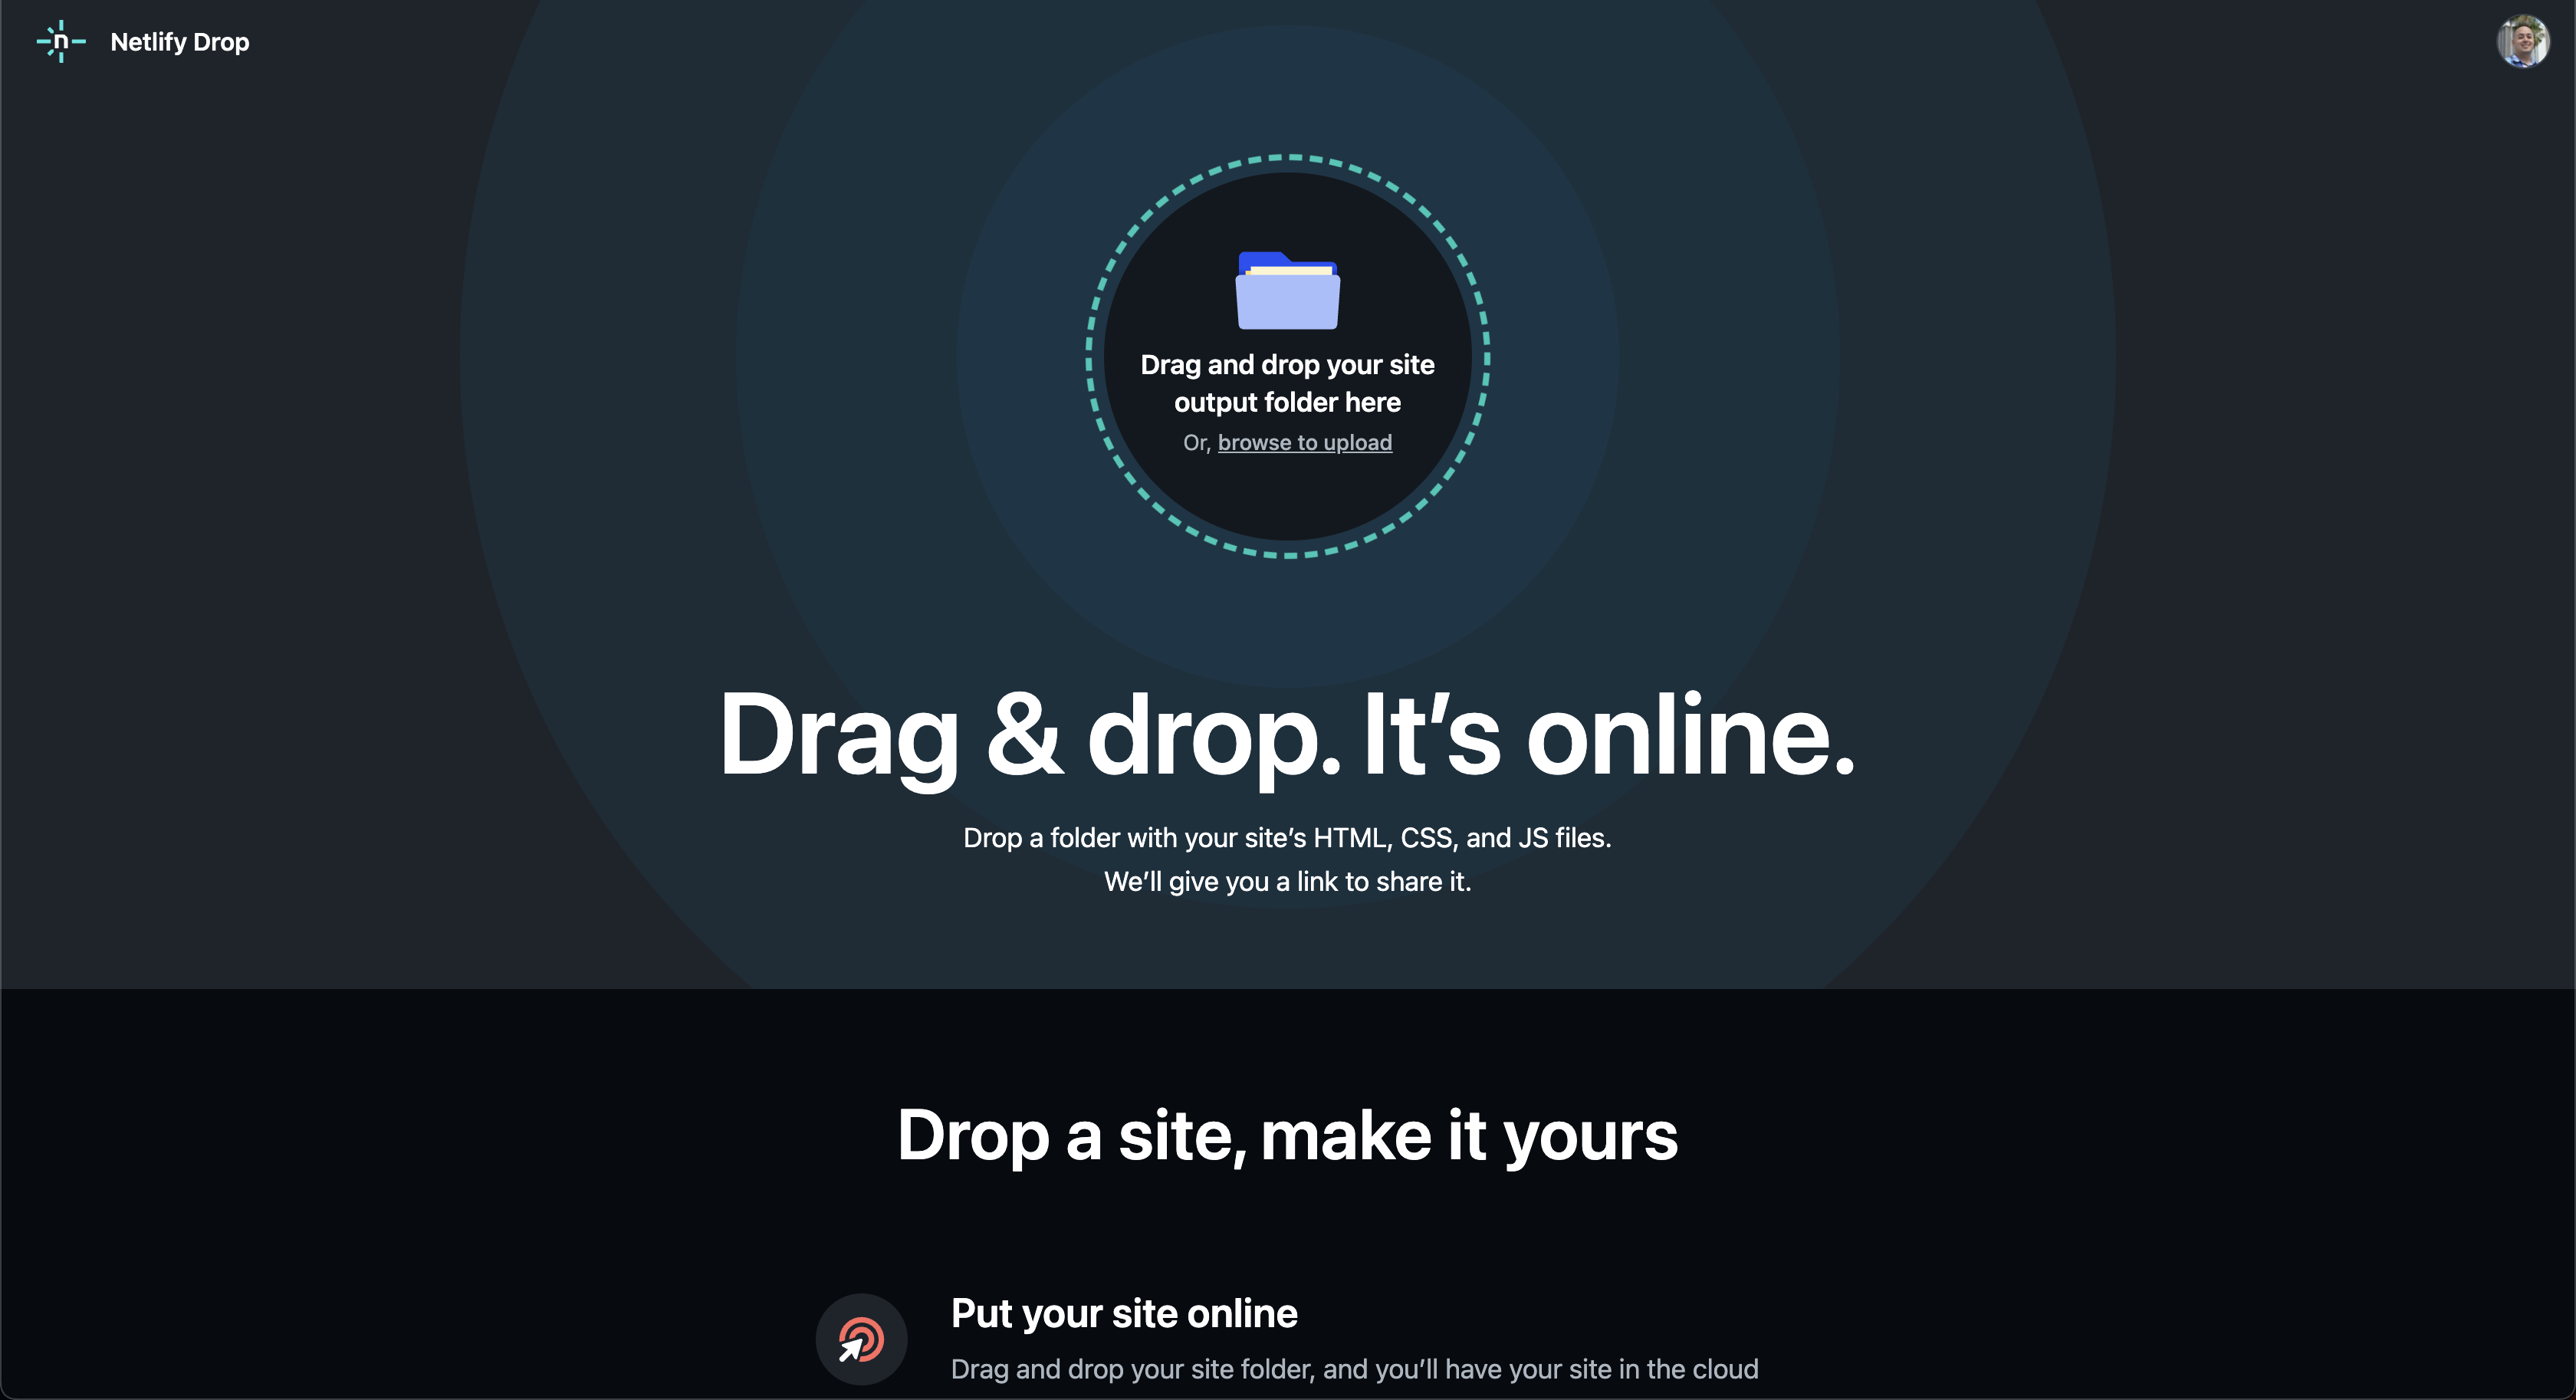
On the next page simply create a new text file and save it as index.html and upload the file to Netlify. Or you can download this file and upload it.
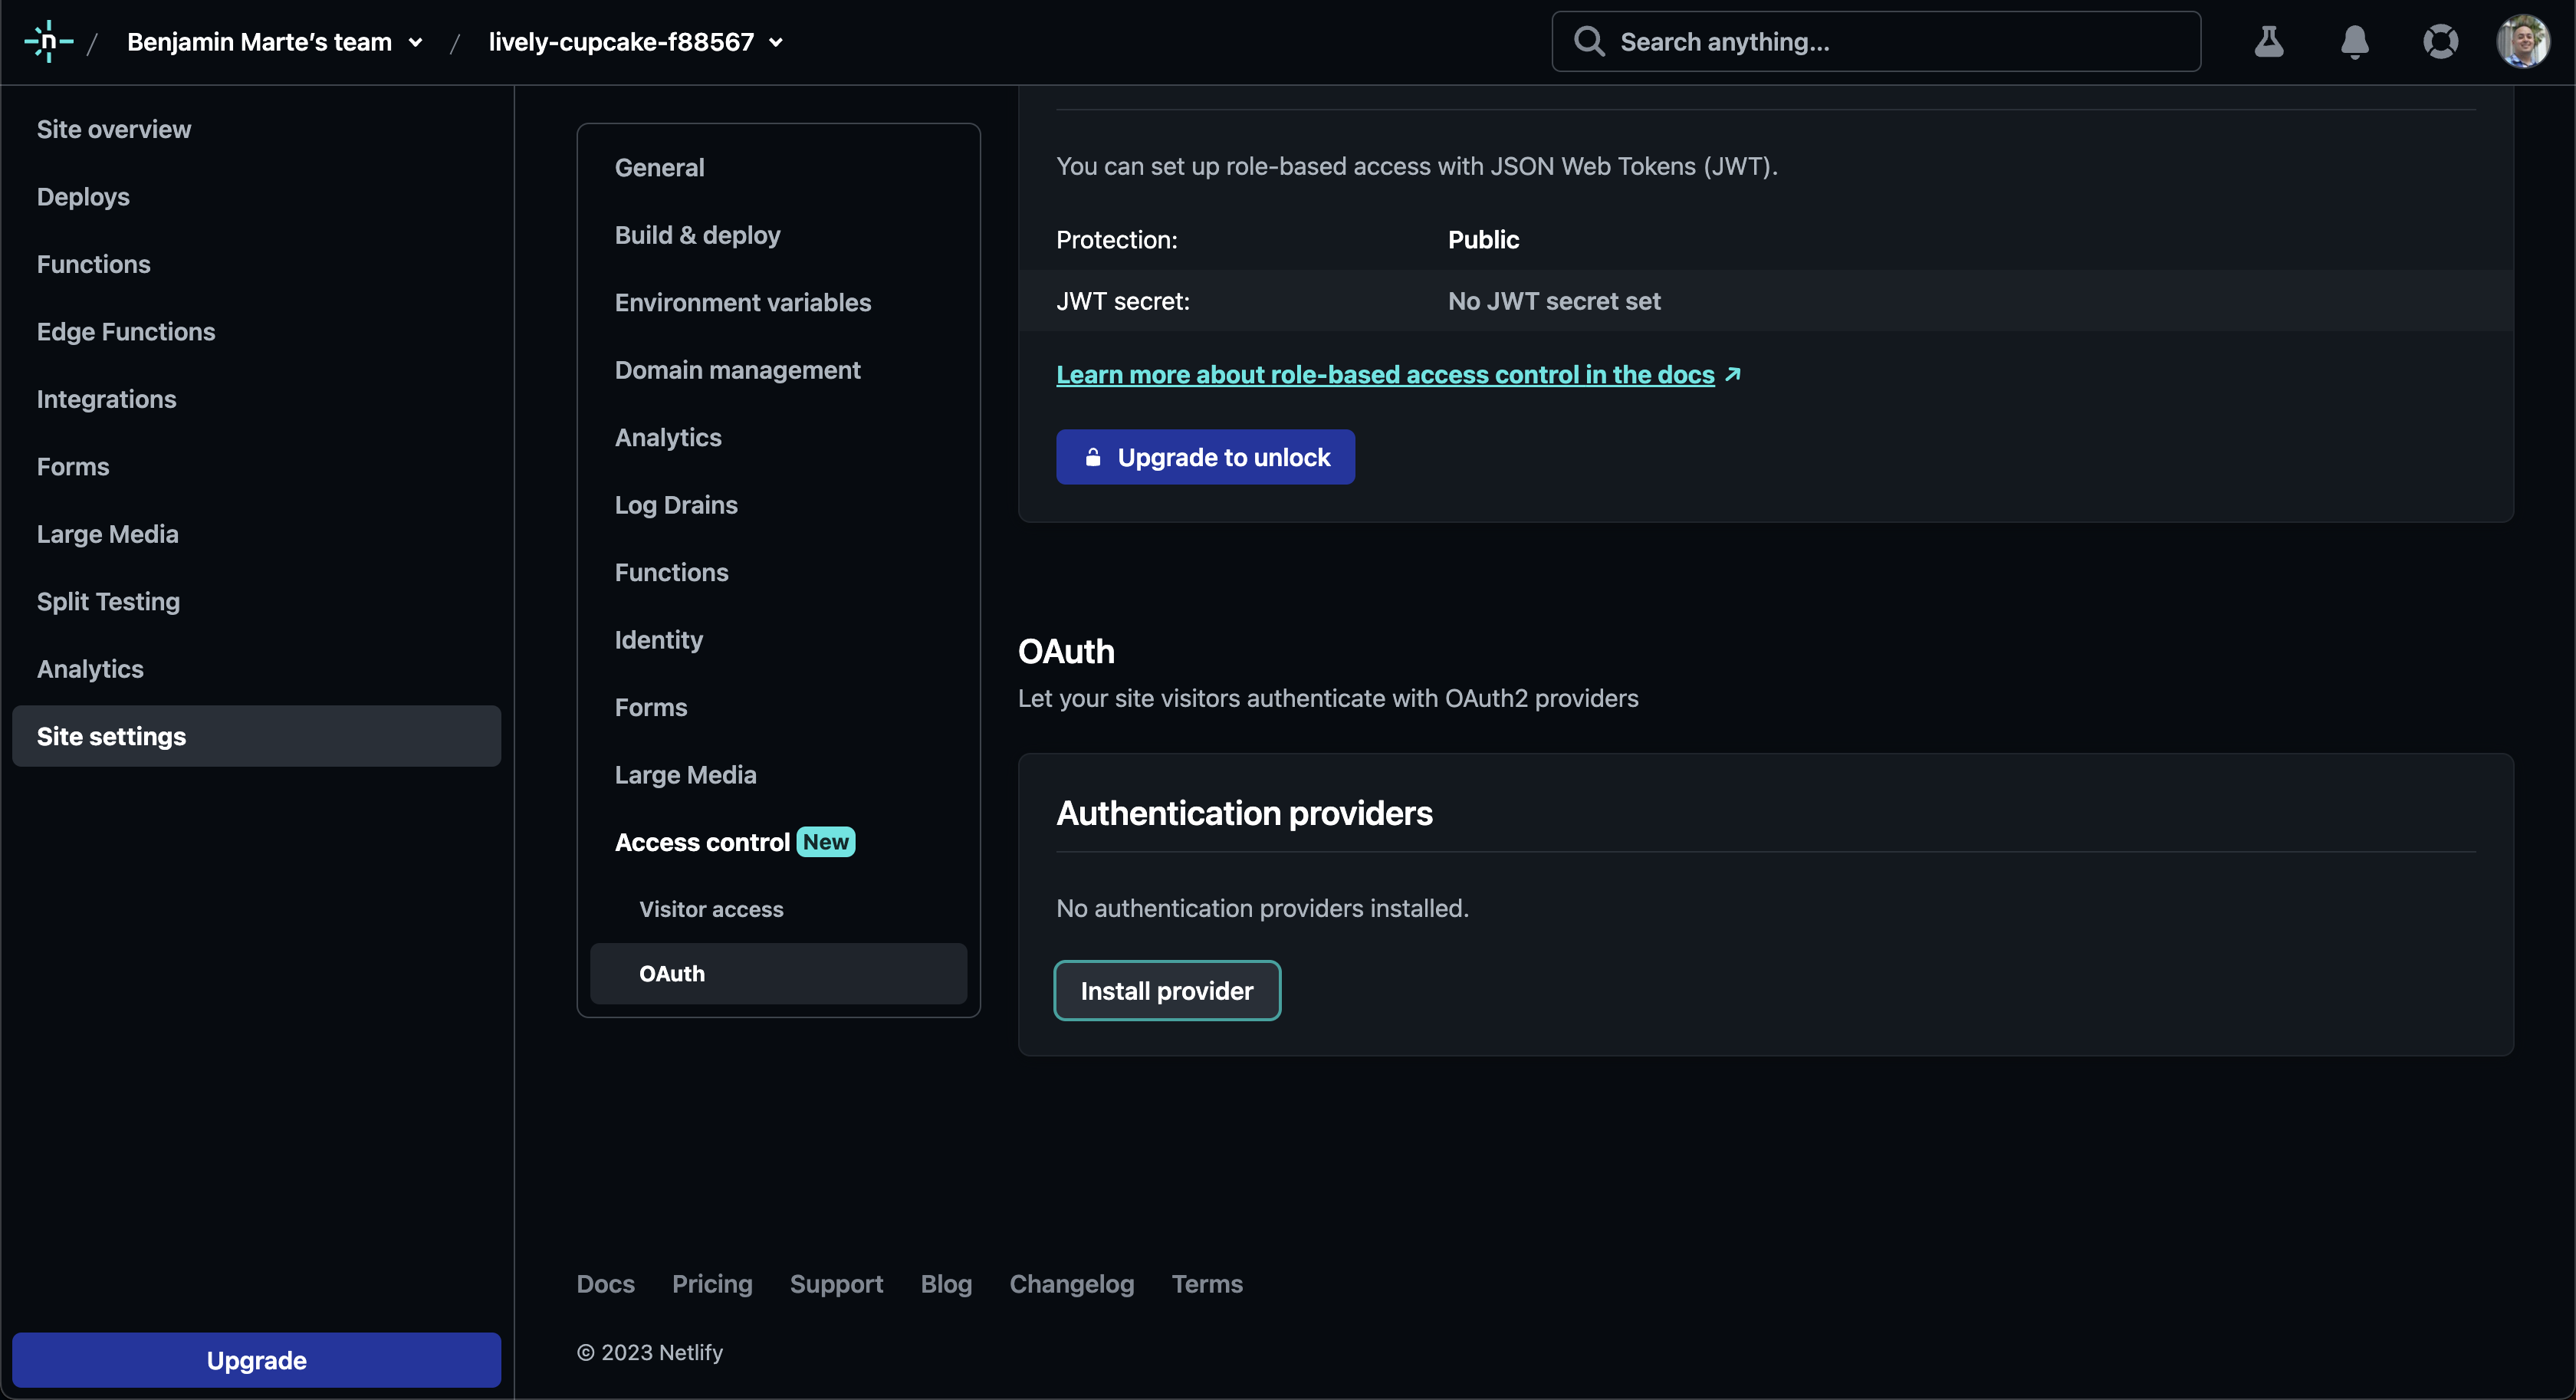
Once your site has been created click on site settings, access control and scroll down to the OAuth section and under Authentication providers click Install provider.
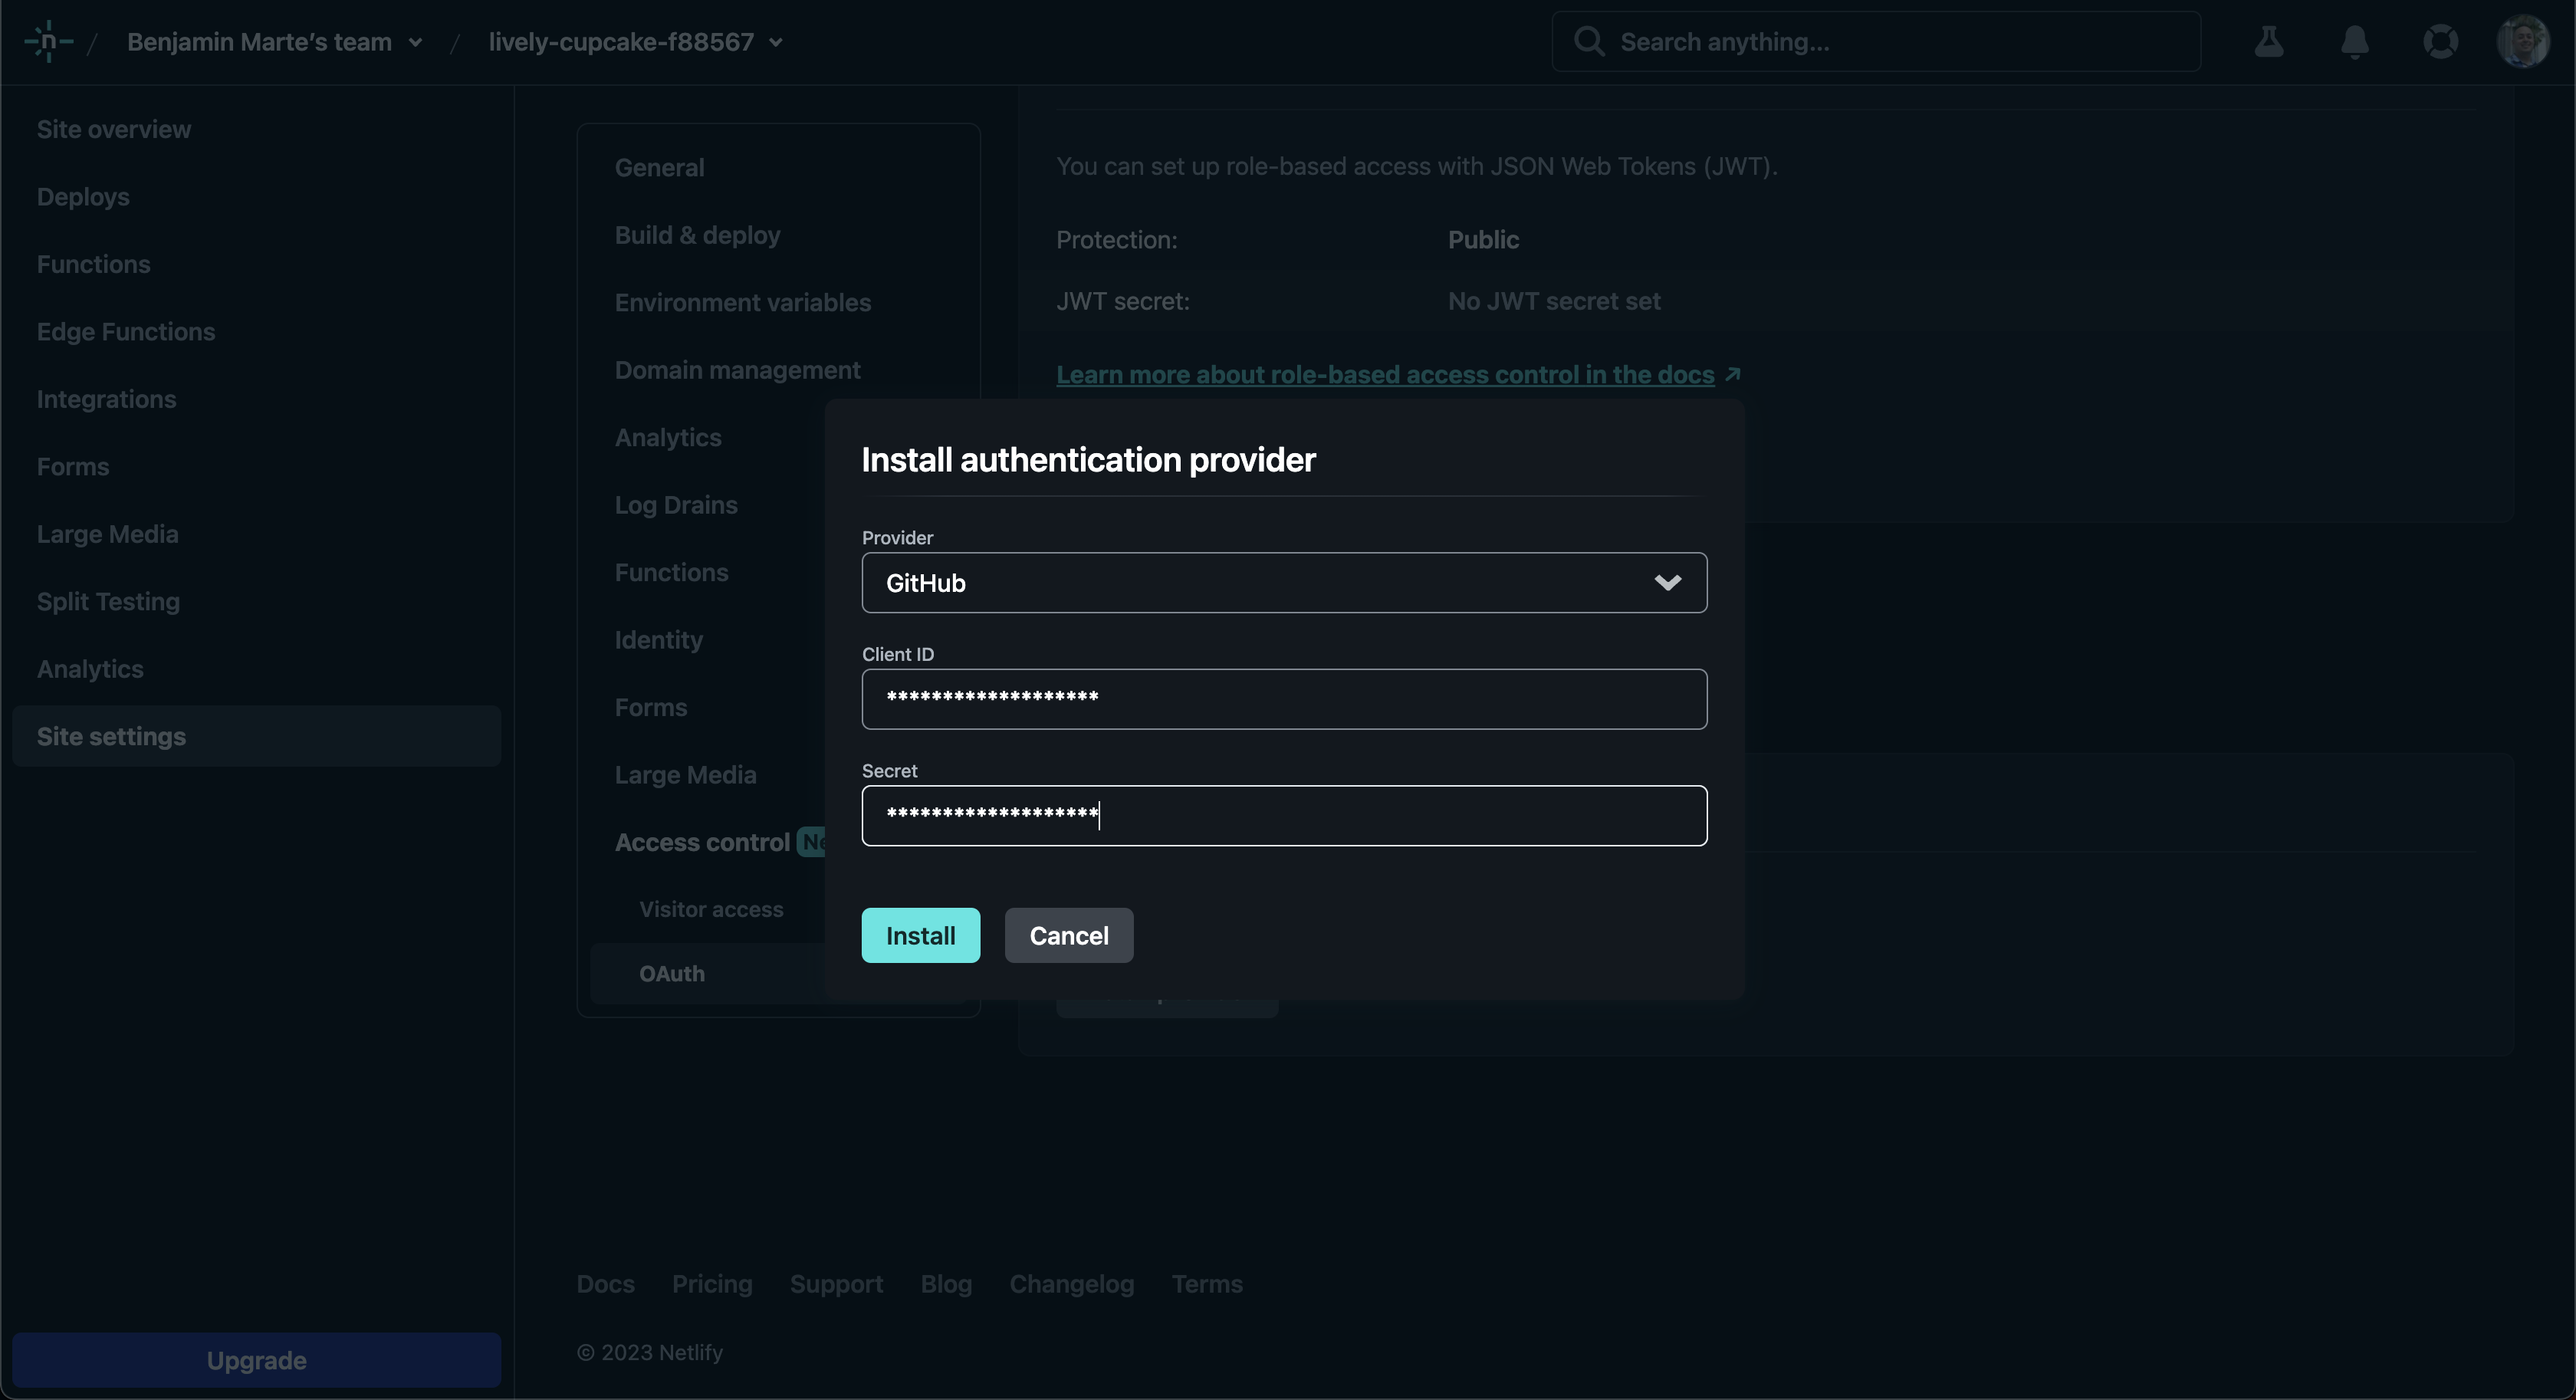
In the modal windows select Github as your provider and insert the Client ID and Client Secret from the previous step and click install.
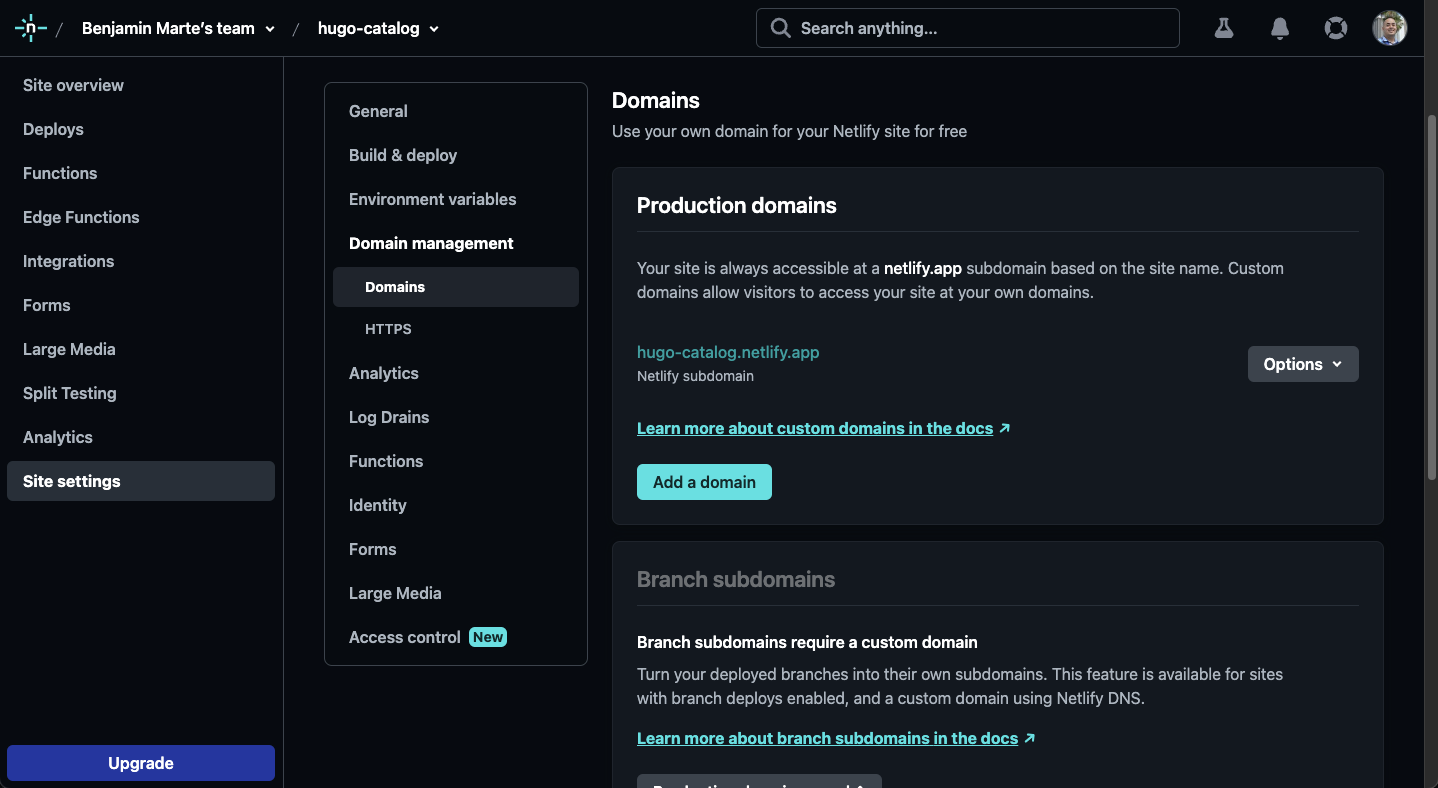
Next, click on Site settings, Domain management and click on Add a domain.
If you are using Github pages to host your site you need to insert: your_github_user_name.github.io and click Verify.
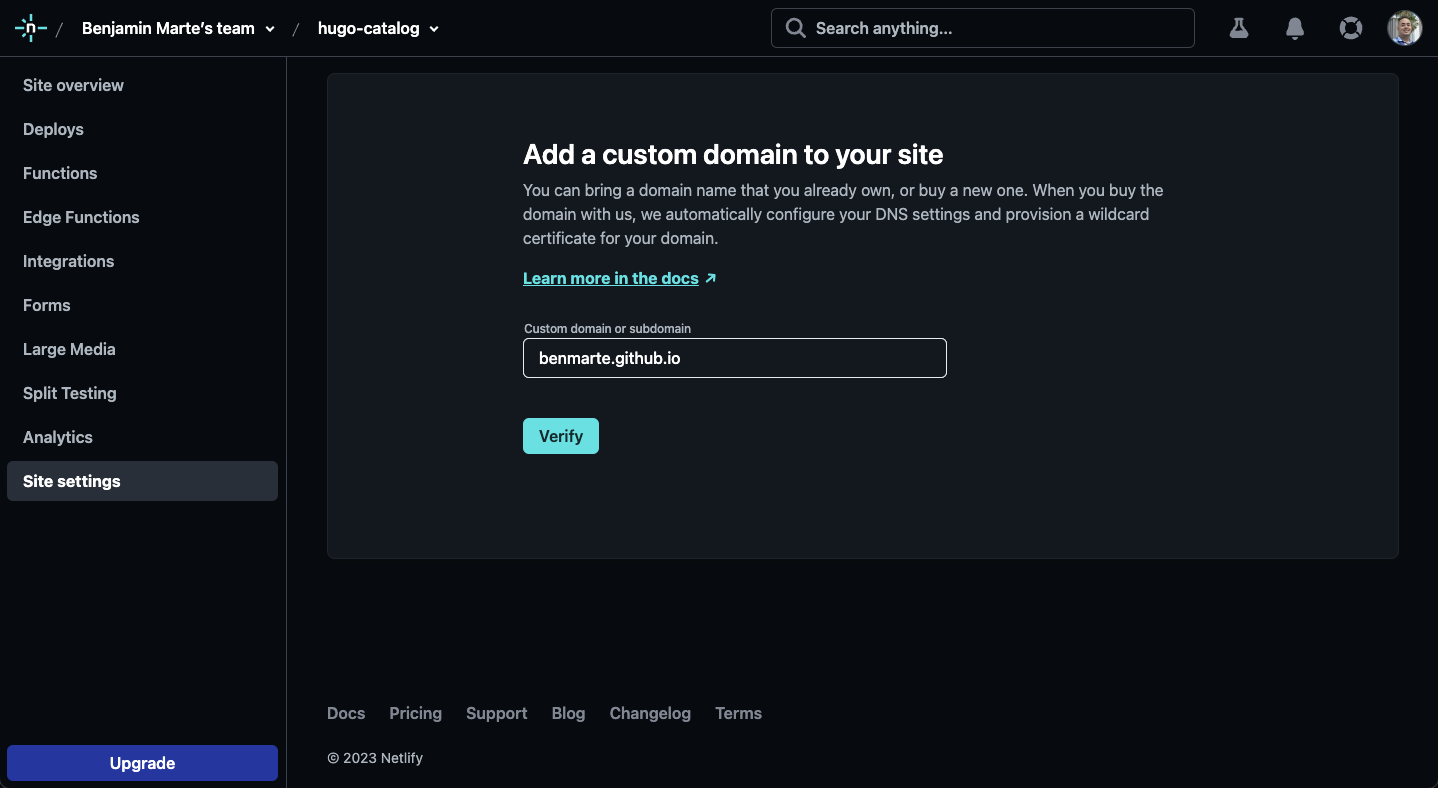
If you are using Gitlab pages to host your site you need to insert: your_gitlab_user_name.github.io and click Verify.

Configure Decap for Github Pages
Now we need to edit decaps configuration file which is located in /themes/hugo-catalog/static/admin/config.yml and you need to set the repo value to your github sites repository and your site_domain to your netlify subdomain.
backend:
  # backend to use
  name: github
  # your github repo ex: benmarte/hugo-catalog
  repo: benmarte/hugo-catalog-site
  # optional, defaults to master
  branch: main
  # your netlify site name ex: netlify-site-name.netlify.app
  site_domain: hugo-catalog.netlify.app

# directory where your images are stored
media_folder: /static/images
# the path the site will use to store your images
public_folder: /images

# enables decap editorial workflow
publish_mode: editorial_workflow

# URL to your company logo to be used in the login screen, logo max width is 300px. Logo can be a relative path or a CDN url.
logo_url: ../images/hugo-catalog-logo.svg

# Collection of pages decap can access
collections:
  # name
  - name: "content"
    # label displayed in decap under collections
    label: "Pages"
    # directory with markdow files
    folder: "/content"
    create: true
    # the filename will be used to generate the url to the page
    slug: "{{slug}}"
    # fields accessible in decap when creating or editing a page
    fields:
      - { label: "Title", name: "title", widget: "string" }
      - { label: "Body", name: "body", widget: "markdown" }
Configure Decap for Gitlab Pages
Gitlab supports pkce authorization so we will need to add 2 additional parameters to our backend entry in our config.yml these are: auth_type and app_id.
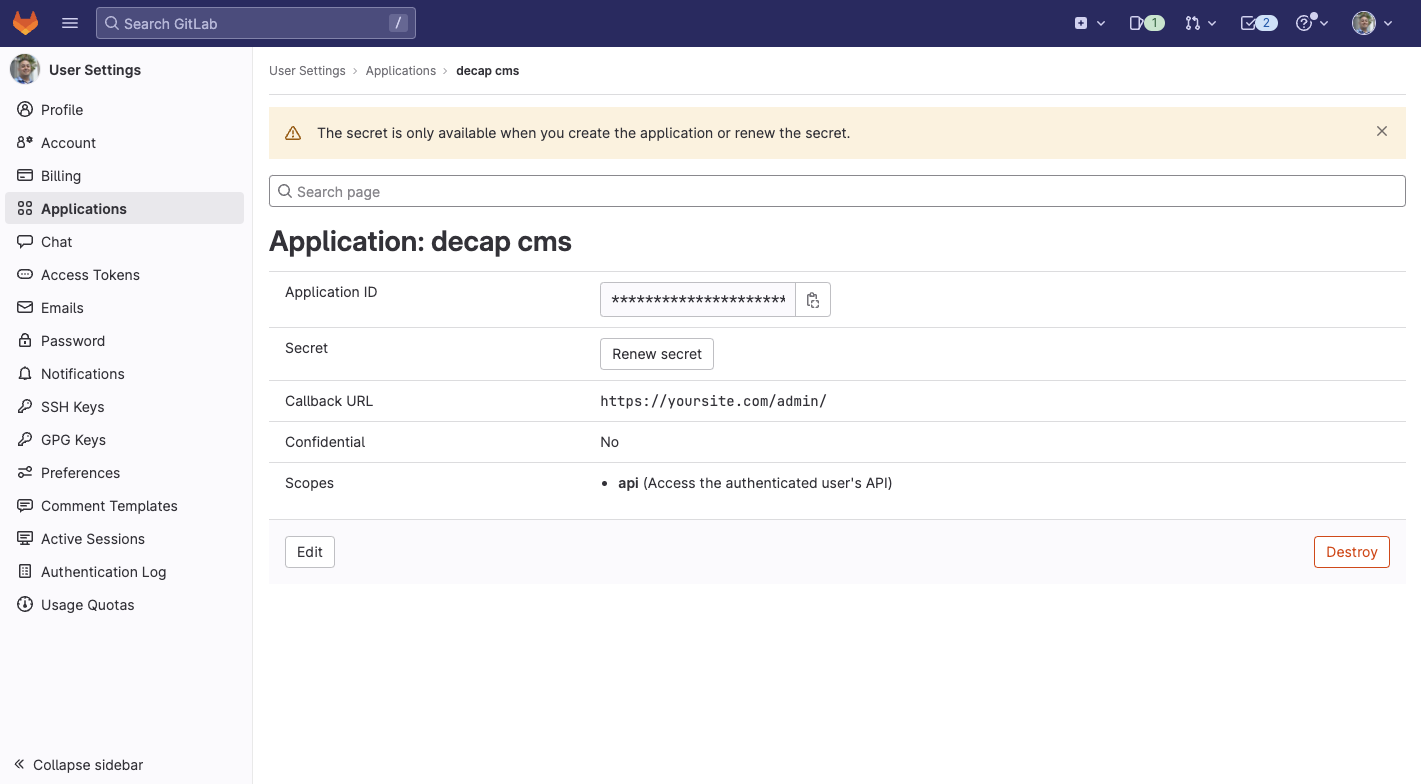
Let’s edit our decap configuration file which is located in /themes/hugo-catalog/static/admin/config.yml and you need to set the repo value to your gitlab sites repository, the site_domain to your netlify subdomain and “auth_type” to pkce and app_id to your Gitlab OAuth App id.
To get your Gitlab OAuth App ID go here: https://gitlab.com/oauth/applications, click on the application to be able to see it’s details and copy the Application ID.
backend:
  # backend to use
  name: gitlab
  # your github repo ex: benmarte/hugo-catalog
  repo: benmarte/hugo-catalog-site
  # optional, defaults to master
  branch: main
  # your netlify site name ex: netlify-site-name.netlify.app
  site_domain: hugo-catalog.netlify.app
  # required for pkce - uncomment if using gitlab pages
  auth_type: pkce
  # application ID from your GitLab OAuth App - uncomment if using gitlab pages
  app_id: your-app-id

# directory where your images are stored
media_folder: /static/images
# the path the site will use to store your images
public_folder: /images

# enables decap editorial workflow
publish_mode: editorial_workflow

# URL to your company logo to be used in the login screen, logo max width is 300px. Logo can be a relative path or a CDN url.
logo_url: ../images/hugo-catalog-logo.svg

# Collection of pages decap can access
collections:
  # name
  - name: "content"
    # label displayed in decap under collections
    label: "Pages"
    # directory with markdow files
    folder: "/content"
    create: true
    # the filename will be used to generate the url to the page
    slug: "{{slug}}"
    # fields accessible in decap when creating or editing a page
    fields:
      - { label: "Title", name: "title", widget: "string" }
      - { label: "Body", name: "body", widget: "markdown" }
Deployment via Github
Hugo Catalog also includes a Github workflow in order to publish your site using Githubs Continous Integration / Continuos Development (CI/CD) pipeline.
Move the github folder located in: /themes/hugo-catalog and move it to your sites root, rename it to .github.
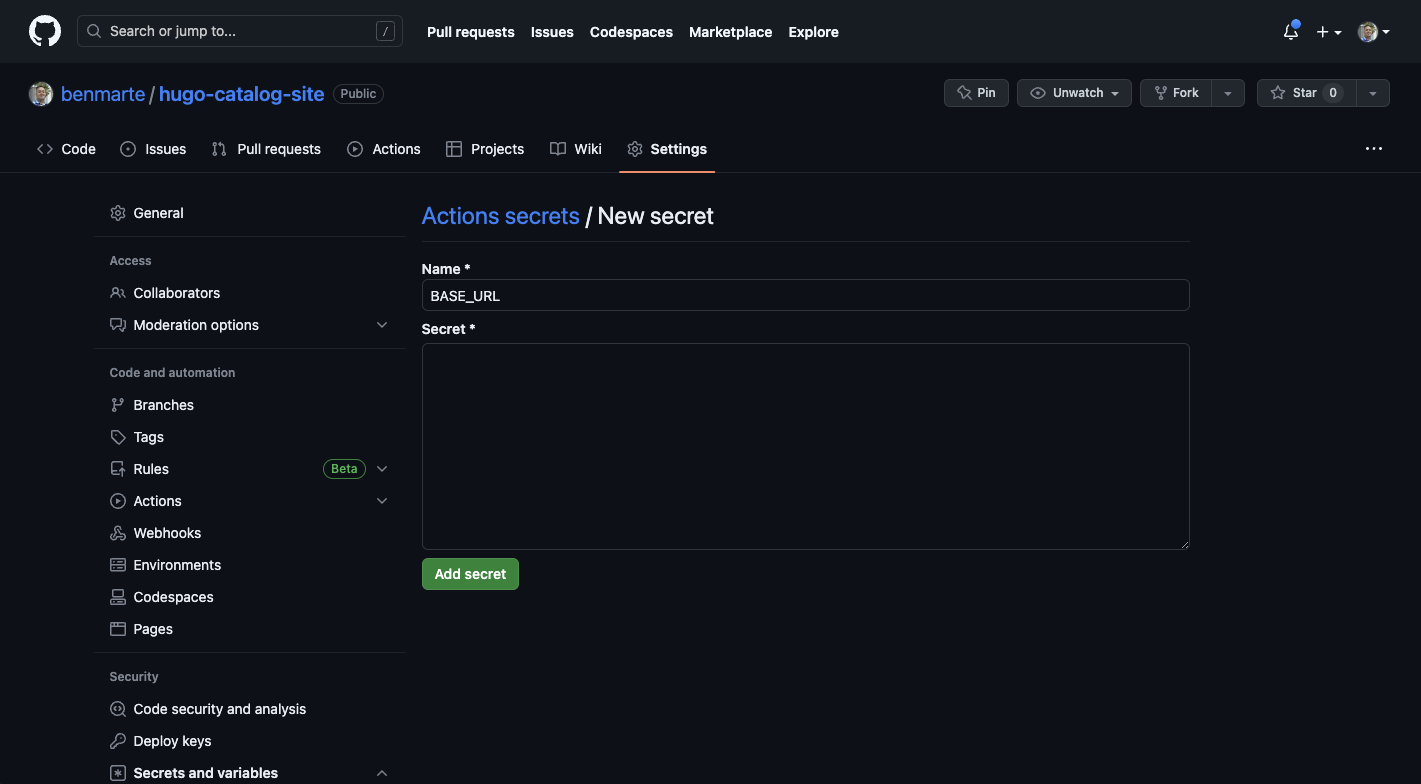
In order to deploy your site to Github Pages we need to add a BASE_URL environment variable in your site settings in Github.
Click on Settings, on the side navigation click on Secrets and variables and select Actions.
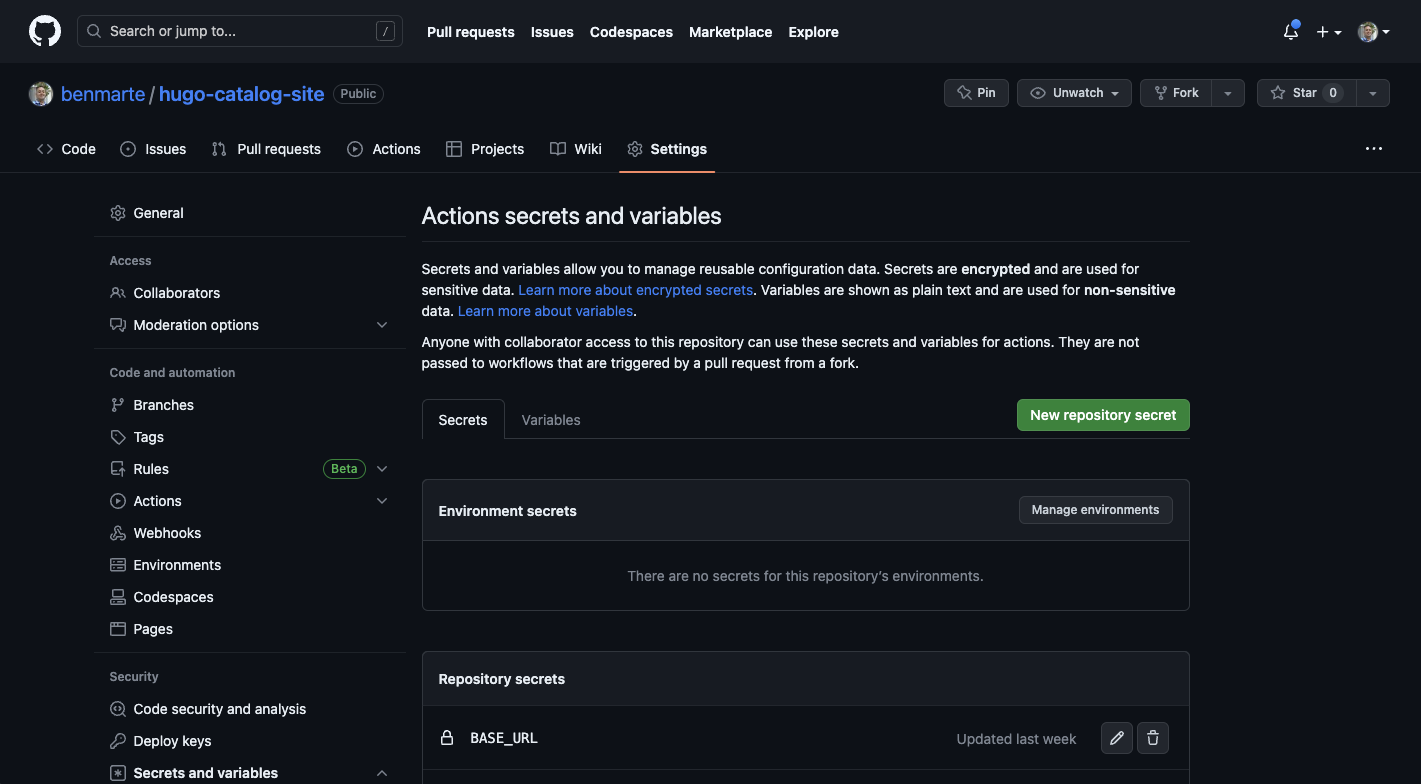
On the Actions secrets and variables page click on New repository secret and in the Name field put BASE_URL and in the Secret field put your sites URL.
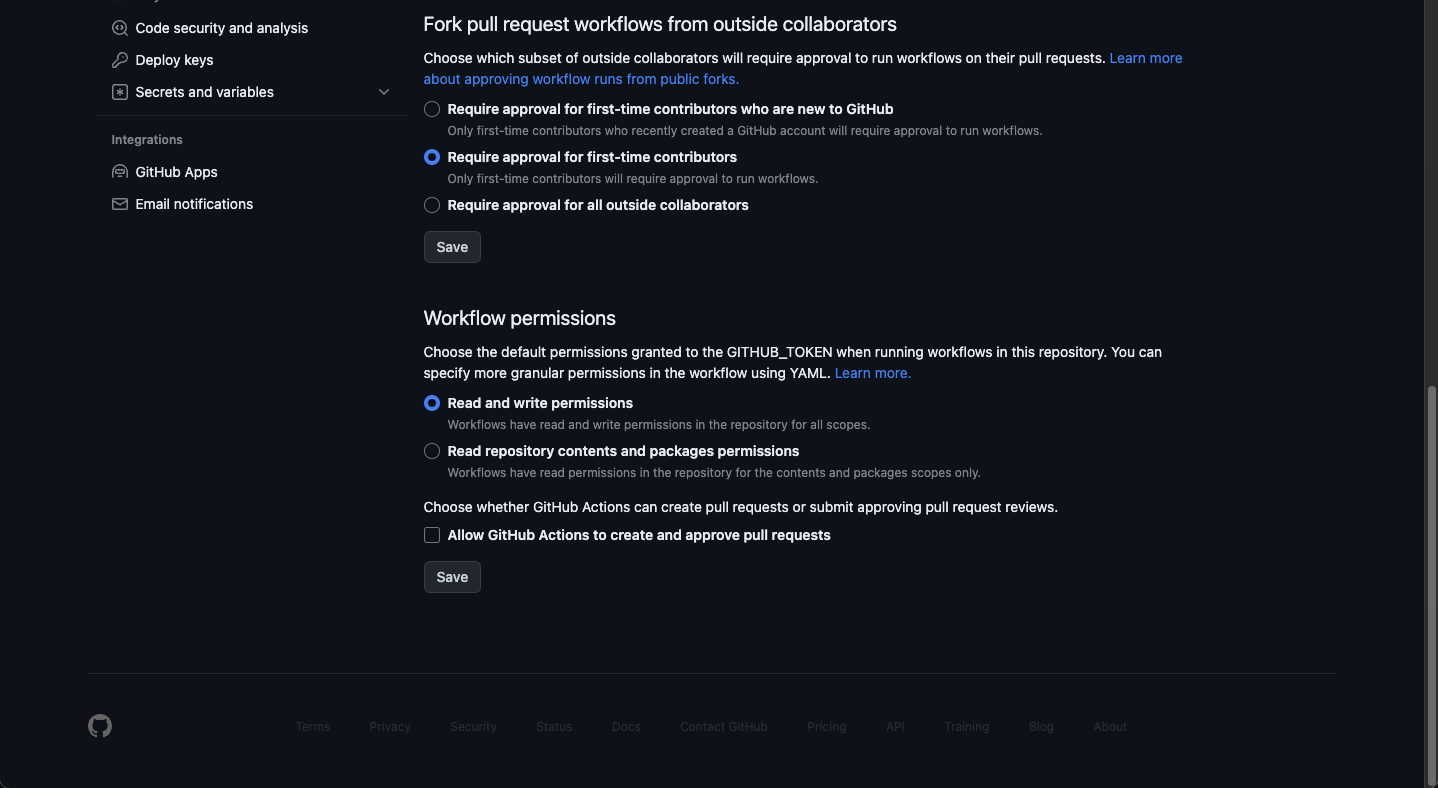
Enable read write Github Workflows permissions in order to allow the worklow to be tirggered automatically every time you make changes to your site.
Click on your site Settings select Actions > General in the side navigation, scroll down to Workflow permissions and ensure Read and write permissions is checked and click Save.
Deployment via Gitlab
We also provide a Gitlab CI template for you to use if you want to host your site on Gitlab Pages and use it’s CI/CD pipeline to publish your site. Simply move the .gitlab-ci.yml file located in: /themes/hugo-catalog/gitlab the root directory of your site.
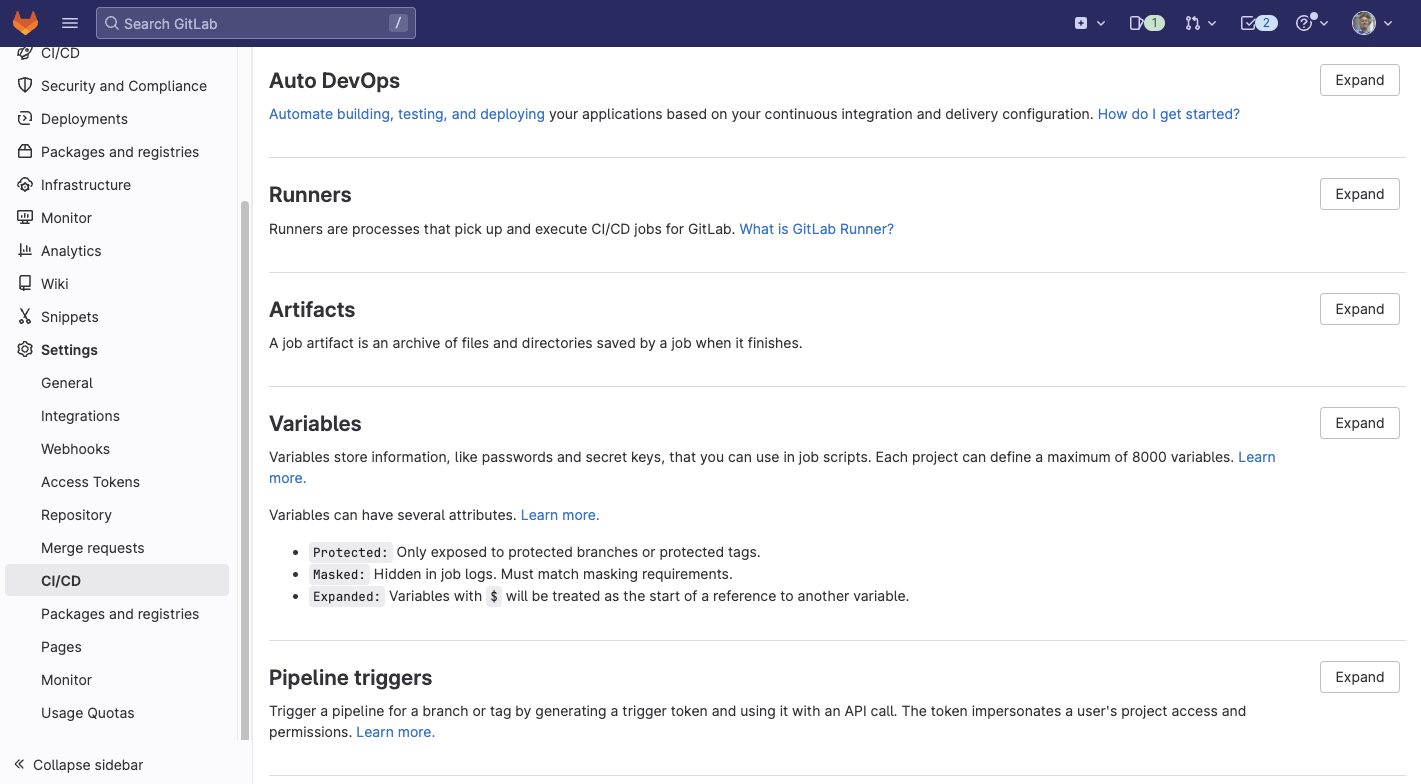
In Gitlab click on the Settings link in the side navigation, click on CI/CD and click on Expand in the Variables section.
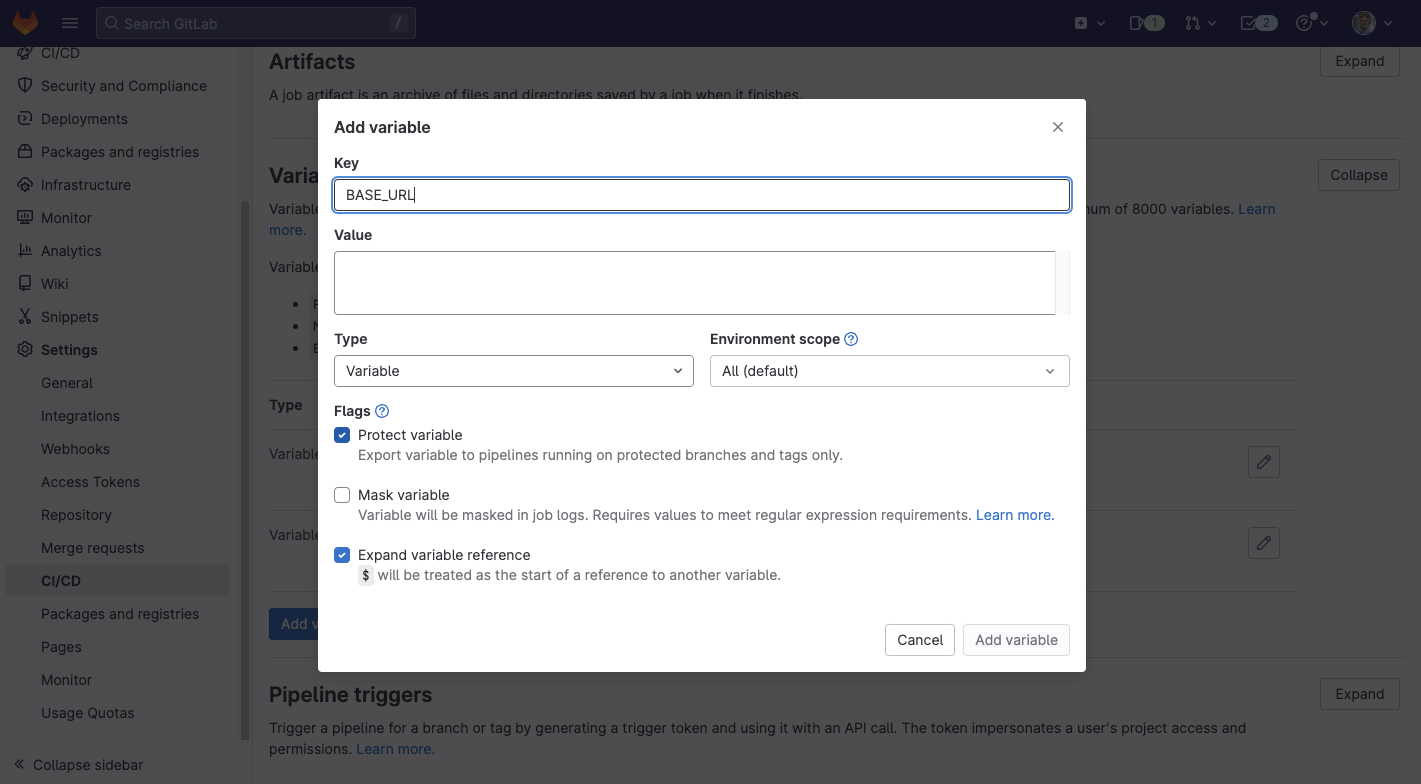
Click on Add variable and in the Key value enter BASE_URL and in the Value field put your sites URL.
Accessing Decap
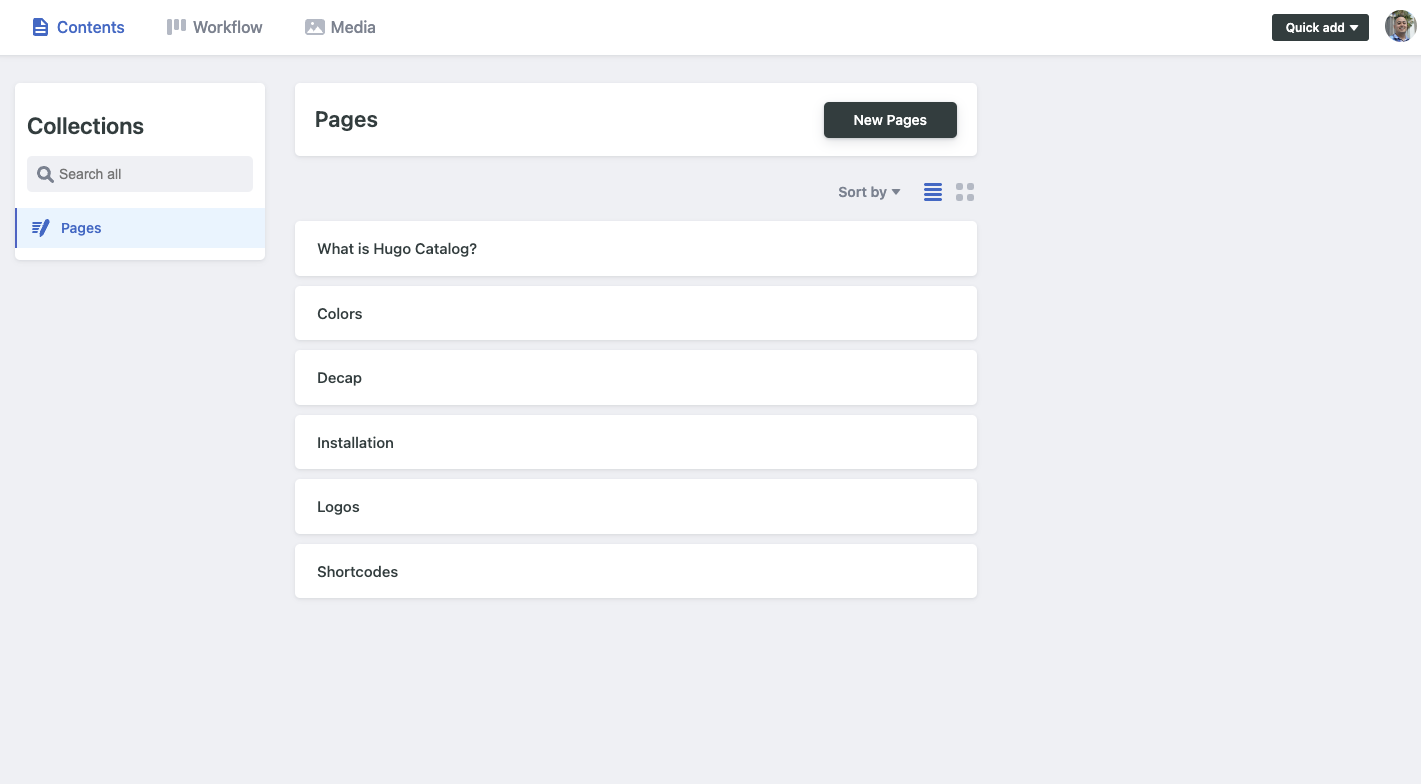
Now that we have completed configuring decap it’s time to take it for a spin. After you have deployed your site if everything was configured correctly you should be able to access decap by visiting https://yoursiteurl.com/admin and you will be greeted with a login with github/gitlab page (will vary based on deployment method).
Once you login you will see a list of pages if you have any otherwise you can create a new page and start using decap.